Original Cooler under Rad
Astra 1.6 Rad
Home made heatshield
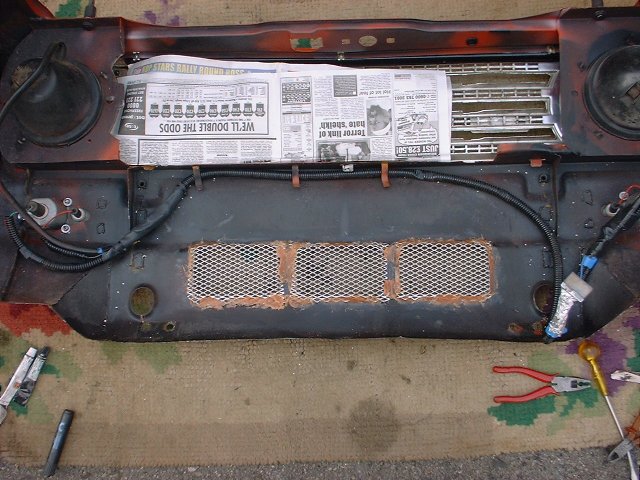
Grille Cutouts needed

Exhaust lagging a must!
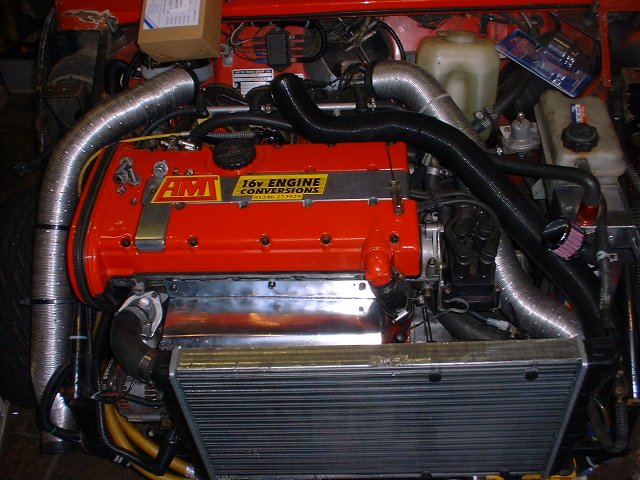
AMT 16V Conversion. Evolution Two (point five)
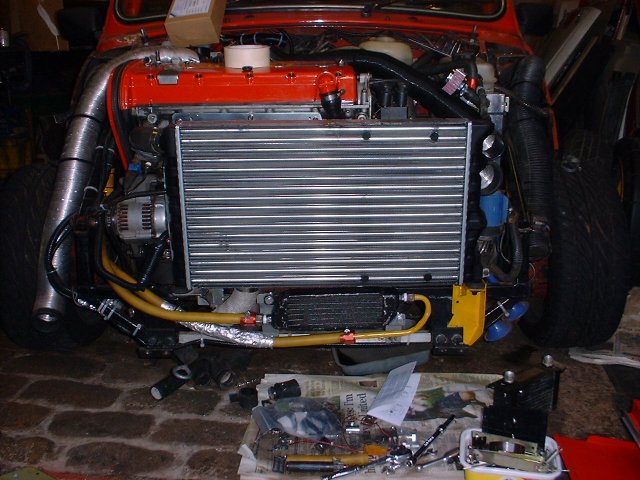
After finally getting the MOT I was able to do some driving again. This immediately highlighted a few unexpected problems. Firstly the clutch was slipping, in fourth and fifth accelerating from about 90 it slipped. This I hope is because I undid the cable adjusters when sorting the new fan position and rad mounts. Worse than that it was overheating. I was only using a Metro rad and the temp just seemed to shoot up. Looking at it I decided I should try and squeeze the biggest radiator I could in, as long as it still fitted behind the clubman grille. AMT suggested an Astramax version but I ended up picking one from a recent 1.6 Astra.
It meant that the section I cut out of the front panel needed enlarging, also the bottom rad support brackets needed changing, the new radiator was much deeper as well as thicker. The new rad had no provision for mounting the fan so I used the straps that mount through the radiator, at the same time I fitted a new thermostat as the old one was dodgy, additionally I drilled the housing so some water was flowing through the system all the time.
Original Cooler under Rad |
Astra 1.6 Rad |
Home made heatshield |
Grille Cutouts needed |
Exhaust lagging a must! |
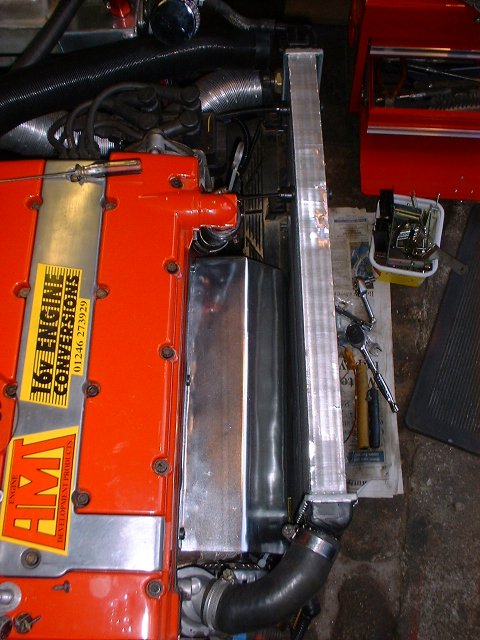
The deeper rad had an impact on the oil cooler too, it wouldn't fit underneath anymore, the only solution I could come up with was to use the original Cavalier oil cooler on custom brackets, fixed to the alloy crossmember. While thinking about keeping heat off the rad and oil cooler pipes I made up a steel plate to shield the exhaust. To keep an eye on the water temp I decided to get a temperature gauge as the Mini gauge didn't work, at the same time I thought I'd get an oil pressure gauge too, so I bought a SPA dual function gauge.
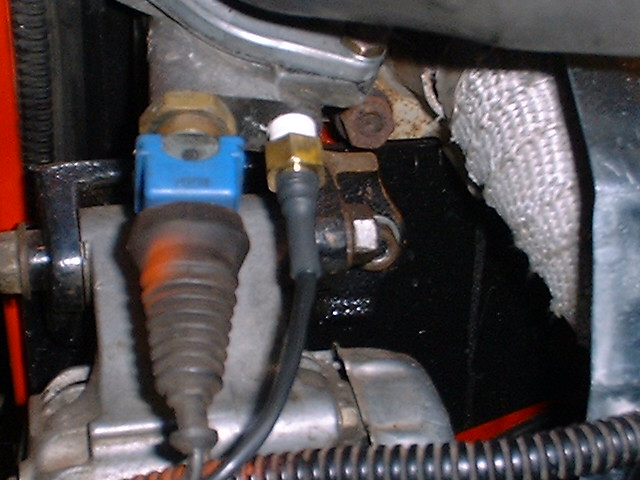 Water Temp temp takeoff |
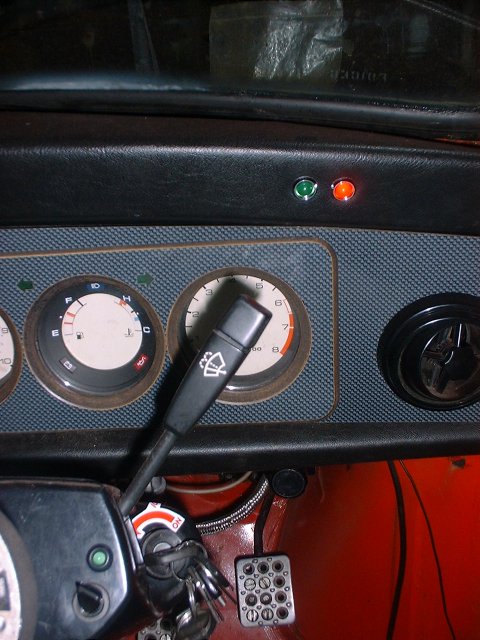
 Gauges in place |
 Warning Lights |
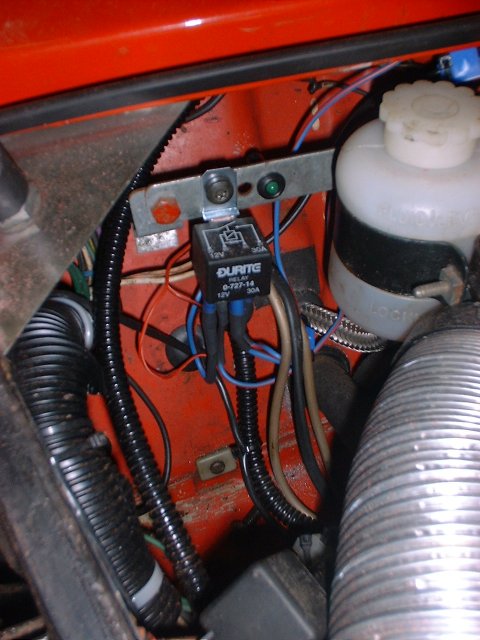 Ext warning activates fan relay |
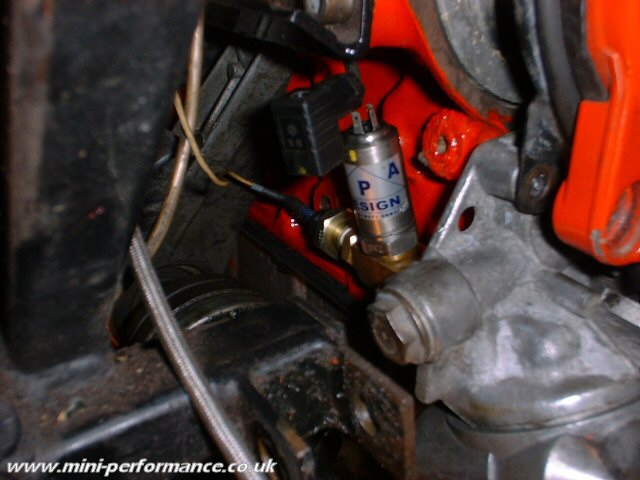 Oil Pressure Sensor |
In common with the SPA Speedo the dual gauge has other functions controlled by a separate switch, again mounted in the ashtray, such as min and max recalls, also the inbuilt warning light and external outputs are user definable. I used the external output on the oil pressure for a warning light in the top dash rail by the steering wheel, the external output on the temp side activates another warning light beside that, it's also linked to the switch and LED on the steering cowling and then linked into a relay in the engine bay which controls the cooling fan (with another LED indicating the relay's on) (yes I like my toys!). This way I have automatic control of the fan and manual override if needed.
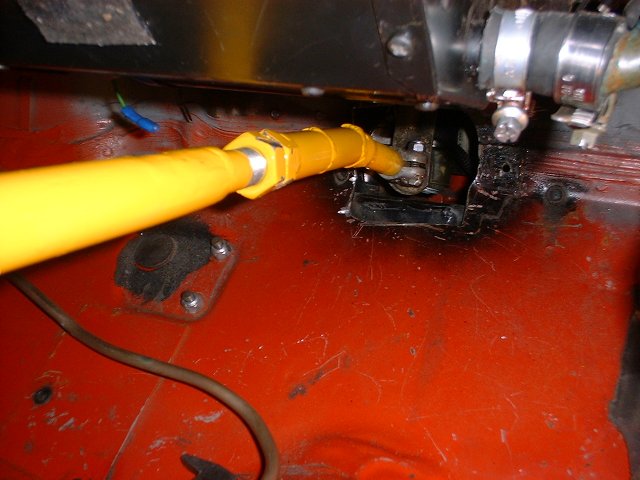
Seeing as the car was in the garage I took the chance to fit the quickshift that had been sitting in the garage for months, this meant enlarging the hole in the bulkhead and fabricating a new box to seal round it. While altering that I cut and straightened the gearchange rod and added a threaded section to permit some adjustability without undoing the pinch bolt. To make it all line up better I raised the gearchange housing on metal brackets at the same time. While the welder was out I fabricated some strenghtening plates and fixed them to the floor where the rear legs of the frame bolt in.
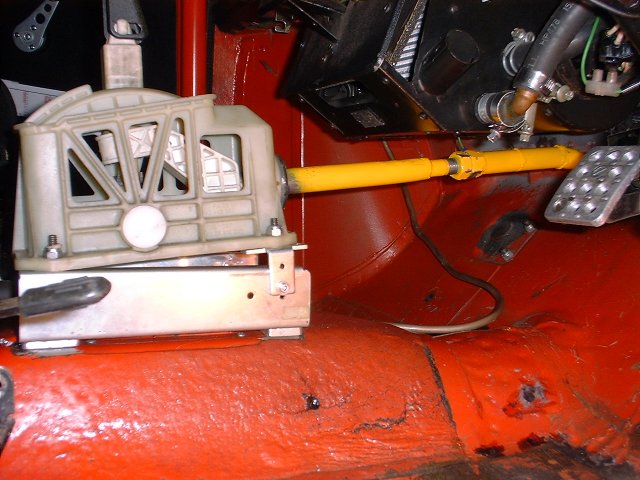 New Gearchange Rod |
 Threaded Section |
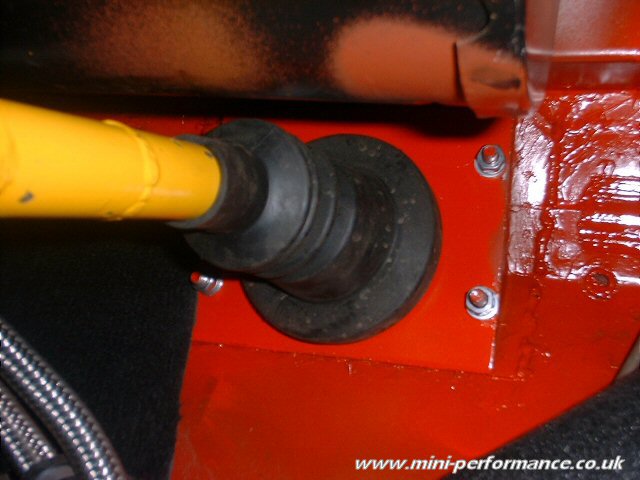 Removable box over hole |
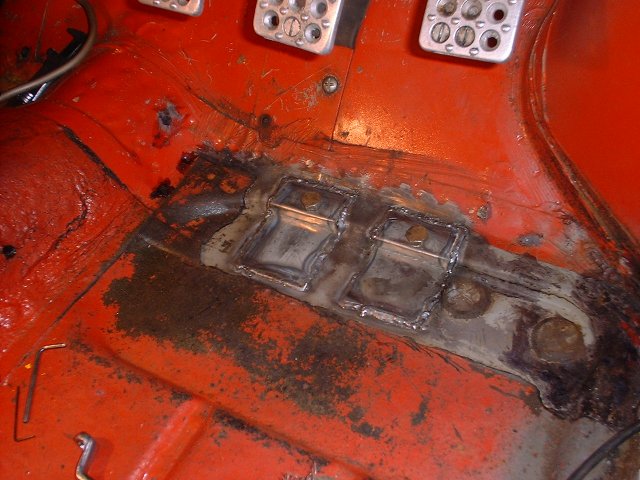 Floor Plates |
December 2003
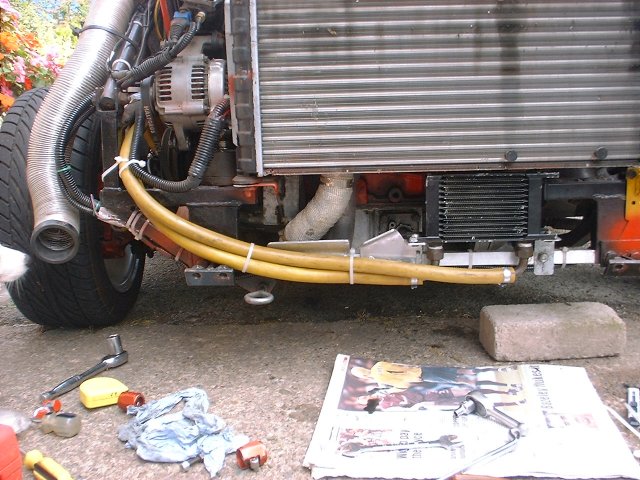
More changes! Earlier in the year we did a trackday at Elvington with Javelin Motorsport, this brought to light a few problems. Firstly the oil cooler pipes were coming off under pressure! If you look at the pic at the top left you can see the metal pipes (painted yellow). The rubber hoses were working loose and leaking a lot of oil, also the connection onto the oil cooler itself wasn't too good due to the knackered threads on the cooler. The solution was to fit the old cooler back with new rubber pipe, I also made the pipes run further from the exhaust and fabricated some small alloy heatshields (see pic below)
 Oil Cooler |
 Mesh added |
 Looks better! |
 Like a glove! |
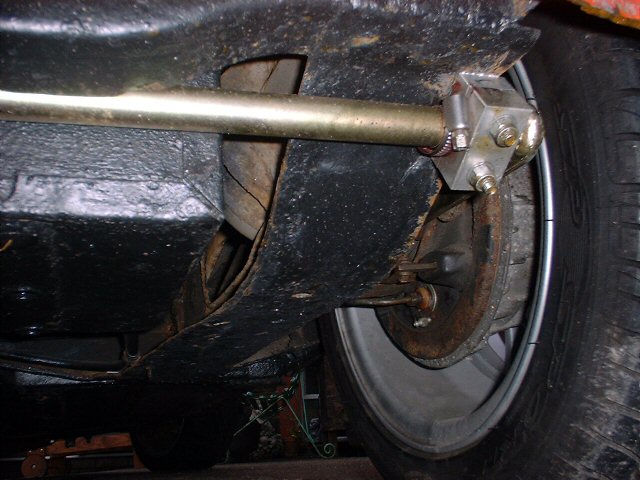
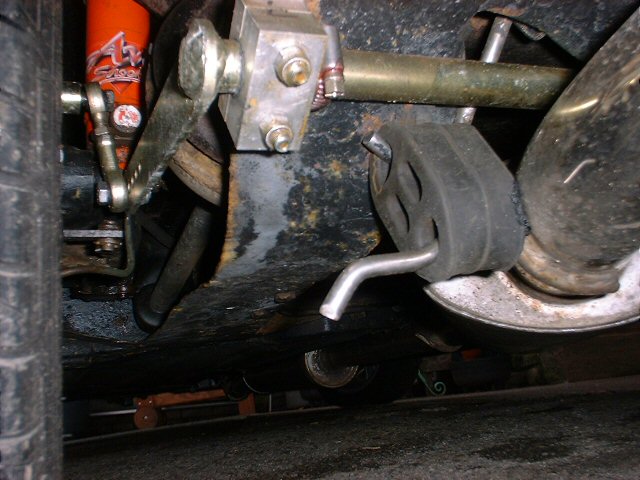
While the front was off I also took the chance to finally get the front valence holes meshed. It was just a case of cutting the mesh slightly oversize and holding it in place with fibreglass. The front looks much better with it done. The other thing I had to look at after Elvington was understeer, or more exactly reducing it. I found that hooning up to the corner and expecting it to follow a nice line wasn't happening. The front was washing wide and reducing speed was the only way to counter it. As going slow at a trackday is NOT the reason I go, I had to find a solution. After some research on the net and seeking advice from the more competition orientated members of the online communtity I bought a Minispares adjustable rear anti-roll bar. The thinking is that you stiffen the rear (or soften the front) to reduce understeer. As I can't soften the front without compromising weight transfer under braking, it had to be the back! You can see the fitted bar in these photos
 |
 |
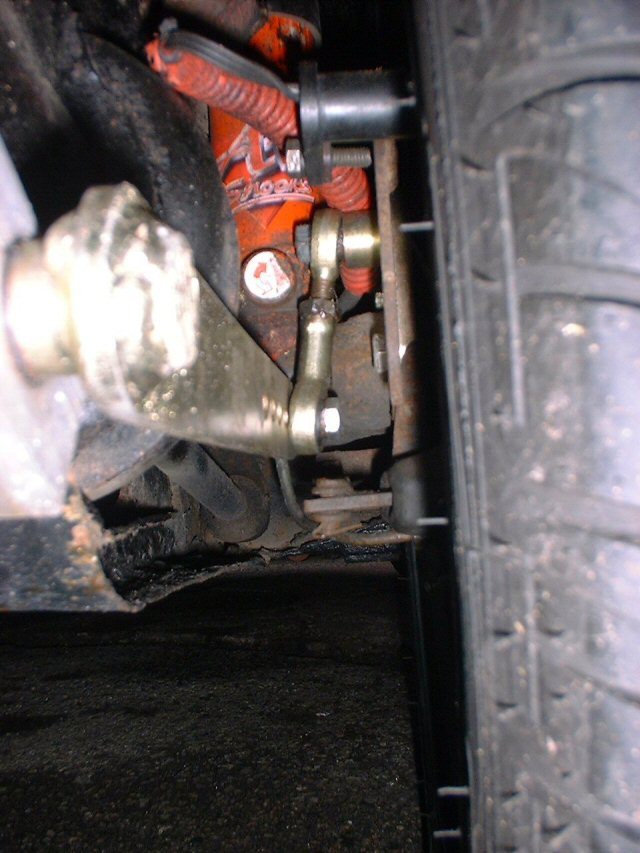 |
Did it work? Damn right it did! Even at the softest setting it went round the corners better. It feels weird at first under cornering and will take some time to get the best out of it I think. Sadly tracktime was a bit limited to get to grips with it fully due to a water system problem but the potential is there.